192.168.1.2
192.168.1.2 is a private IP address that provides access to a range of router and modem settings, allowing you to make changes to your WiFi password, Network Name (SSID), and various default configurations. To get started, follow these steps:
Step 1: Logging In via 192.168.1.2:
- Open your web browser.
- In the address bar, type “192.168.1.2.”
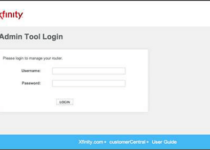
Step 2: Default Login Credentials:
- You will be prompted to enter login credentials.
- Refer to the default Username and Password, which is typically found on a label on the back or side of your router or modem.
Step 3: Accessing the Router Interface:
Upon successful login, you will gain access to the router interface.
Note: Default Username and Password for 192.168.1.2
- TP-Link
- Username: admin
- Password: admin
- D-Link
- Username: admin
- Password: admin
- Huawei
- Username: admin
- Telecomadmin
- Username: admin
- Password: admintelecom
- ZTE
- Username: admin
- Password: admin
- Alternate Password: Web@0063
Encountering Login Issues:
If you face challenges accessing the 192.168.1.2 IP address, consider the following:
- Connect to your router’s WiFi network before attempting to log in to the router admin panel.
- Verify that you are entering the correct router IP address. You can learn how to find the IP address of your router for reference.
- If you’ve forgotten your router’s username or password, you can perform a factory reset to revert custom settings to the factory default. Here’s how:
Factory Reset Procedure:
- Locate the small “RESET” button on your router or modem.
- Press and hold the “RESET” button for 10-15 seconds until the LED lights begin to blink.
- Once the factory reset is complete, you can use the default username and password to log in to the router web-management UI.
By following these steps, you can efficiently configure your router and modem settings using 192.168.1.2, including changes to your WiFi password, Network Name (SSID), and other default configurations.

About Author
Viransh
HI, Iam Viransh Blogger, Internet service Provider and Worked with Many routers while providing internet service, which include Tp-link, D-link,Netgear and all Mojor router.