ATTWiFiManager Login
ATTWiFiManager serves as the local web address to access the admin panel of AT&T routers. The router login page contains all the essential settings for both the router and the Wi-Fi network. This includes settings for AT&T routers, and after logging in, you can effectively manage these settings.
ATTWiFiManager Login
To log in to the admin panel of your AT&T router, follow these steps:
- Ensure that your PC or laptop is connected to the router either via an Ethernet cable or through the router’s Wi-Fi network.
- Open a web browser on your PC or laptop.
- In a new tab, enter the local web address for AT&T routers: “http://attwifimanager/” or “http://192.168.1.1” in the address bar, and press Enter.
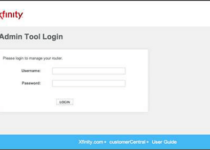
- You will be directed to the AT&T Router Login Page.
- Enter the router’s password to continue. The default password for AT&T routers is “attadmin” (please note that the password is case-sensitive).
- Once you enter the correct password, you will gain access to the AT&T Router Settings page, where you can manage all the router settings.
How to Change the AT&T Router Wi-Fi Password and SSID
For security reasons, it is recommended to change the pre-configured Wi-Fi network SSID and password on your AT&T router. Here’s how you can do it:
Change Wi-Fi Network Password:
Follow these steps to change the Wi-Fi password on AT&T routers:
- Log into the AT&T Router Settings using the method mentioned above.
- After logging in, you will be on the home page. Navigate to “Settings” and select “Wi-Fi” from the left-side menu.
- In the “Main Wi-Fi Network” section, locate the “Wi-Fi Password” field.
- Enter your new Wi-Fi password in the designated field.
- Click “Apply.”
- The Wi-Fi password will be changed, and you will need to reconnect to the Wi-Fi network from all previously connected devices.
Change Wi-Fi Network Name/SSID:
Follow these steps to change the Wi-Fi Network Name/SSID on AT&T routers:
- Log into the AT&T Router Settings using the method mentioned above.
- You will land on the home screen of the router. From the left menu, select “Settings” and then “Wi-Fi.”
- In the “Main Wi-Fi Network” section, find the “Wi-Fi Network Name” field.
- Enter the new Wi-Fi Network Name in the provided field.
- Click “Apply.”
- The AT&T Wi-Fi Network Name will be changed, and you will need to reconnect from previously connected devices as they will be temporarily disconnected from the network.

About Author
Viransh
HI, Iam Viransh Blogger, Internet service Provider and Worked with Many routers while providing internet service, which include Tp-link, D-link,Netgear and all Mojor router.